VR Development is Easier Than Ever: With tools like Unreal Engine 5.6 and Meta Quest 3, much of the previous complexity around drivers, compatibility, and performance has been resolved.
OpenXR is the New Standard: The adoption of the OpenXR protocol simplifies cross-device compatibility and reduces the fragmentation that used to plague VR dev workflows.
Using the VR Template Saves Time: Unreal’s built-in VR template includes essential components like the VR Pawn and grab system, speeding up prototyping.
Nav Mesh is Crucial for Movement: Proper setup of the navigation mesh is required for teleportation and smooth user movement in VR environments.
Interactive Objects Require Physics & Collisions: To make objects grab-able, you must enable physics and ensure appropriate collision settings.
Importing VR Features Into Existing Projects is Simple: You don’t need to start from scratch—Unreal makes it easy to import VR functionalities into any existing scene.
Asset Libraries (like Fab) Amplify Creativity: High-quality free and paid assets allow for immersive world-building without needing a full art team.
Cable Link Reduces VR Sickness: For development, a wired connection (via Link Cable) ensures stability and better frame rates, reducing motion sickness.
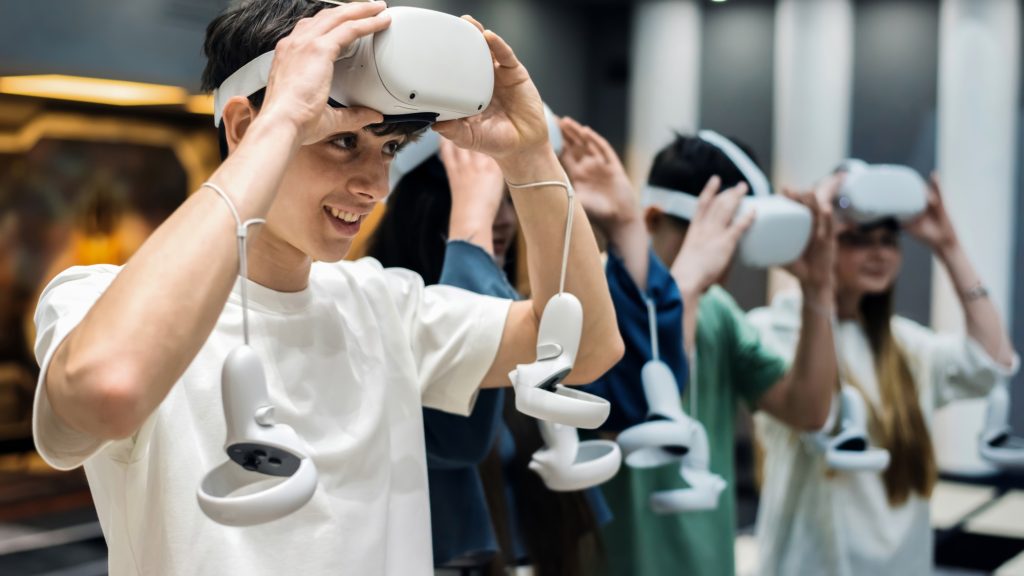
Hey, Technomancers. So you want to get into VR development and you need a quick start. So let’s get into it. What you’re going to need for this session is you’re going to need Unreal Engine installed in your system. You are going to need, optionally an Oculus Quest or Meta Quest connection type cable, which is essentially just a C type cable, and you will obviously need a VR headset.
We’re going to use the Mesa Quest three S for this demo. Let’s get into it.
Okay, so there’s a lot of VR tutorials out there, especially of Unreal Engine. The only reason I’m making this one is because I found them very lacking. Like, they’ll hit one topic and they won’t really, like give you enough of a get started to really kind of get up and running. So I want to make sure that I do that.
So firstly we’re going to do this tutorial in Unreal Engine 5.6, which has just recently been released. And although it’s not really what you consider super production ready, if you’re really going to use a lot of its bleeding edge features. Like, I would not necessarily trusted with all the different things. That’s kind of stating out there. It’s still very cool.
It’s still got some really cool features, and from some standard items, it’s great. I wouldn’t necessarily upgrade my project just yet, not at least until kind of into the, you know, current calendar year, which is 2025. But that being said, our focus today is going to be virtual reality. And I’m going to give you just a quick little bit of a backstory around this.
Like, firstly, it’s going to be so much easier if you’ve got a meta quest, if you’ve got Unreal Engine, it’s going to be so much easier to do this than it was in the past. In the past, it was tricky. It was buggy. You’d had to make sure that you’ve got Android Studio installed. There were compatibility sort of driver issues.
Sometimes it would respond, sometimes it wouldn’t respond. And in the current version it’s pretty good. It’s got a very good flow. We are not going to look at installing the Android packages because we’re not going to be looking at compiling and building. Today is just a get up and started process. So if you’re, you know, new to virtual reality development or you’ve got some experience, you just want to get used to it inside of Unreal Engine and you want to figure out the core essentials that you need to know to get started, to take existing Unreal Engine knowledge.
So I’m not going to cover a lot of deep Unreal Engine stuff in this one. So this is definitely something I’m happy to do more tutorials on if you like it, if you find it interesting. But with all of that out of the way, let’s get straight into the action.
The first thing you want to do is, if you haven’t already, you want to download the Meta Quest app, you’re going to need that in order to have the compatible drivers for your meta quest, as well as to switch it over into XR mode. So let’s get that started first. So you’re going to get a meta that com forward slash quest forward slash setup depending on the time when when you’re watching this video that you’re on may change.
So just go to the Meta Quest site or just search on Google for the Meta Quest app. So I’m on here right now and I’m just going to scroll down. I’m going to get the middle link quest, the Meta Quest. I’m going to get the Meta Quest link app. And I’m going to hit going to go ahead and install that.
And you’re pretty much just going to follow the walkthrough for the experience. So you’re not going to really struggle with it. Very nice and put together. And you see in the past there was quite a lot of issues with, VR because different providers will use different standards. And that’s now kind of changed in recent years where everyone kind of adopted this open XR standard and the beauty about that, especially if you’re an Unreal Engine developer, it makes compatibility across devices a lot better for us to work with.
So we’re just going to let this install I’m going to walk you through this process. Obviously you’re going to need to be logged into your Facebook account or your account in order to kind of authenticate this if it’s your first time. Okay. So while that’s installing, you can also if you haven’t already, I’m sure you’ve gone already or otherwise you wouldn’t be watching this video.
You can just pop on to Unreal engine.com, and you can go to download in order to download the Epic Games Installer, which will then kick in and start downloading. And you can then use that to install the engine by selecting an option there. I’m not going to cover that in detail. Everyone does. It’s a little bit boring. So then quick tip when you’re kind of getting started while waiting for that installations to kind of finish up, you can always pop into the unreal Engine store or the fab store.
The fab.com is kind of the new store that, is really like a conglomeration of a lot of the different stuff that they used to be doing. Anyway, the fab store is basically where you can get a whole bunch of assets, not only the ones that you can buy, but if you’re new to it, you can always pop in here just like your Unreal Engine, and just go and look through that for some totally cool and fun tools to play around with.
Inside of this, if you do pick the free options, you’ll be able to get some nice, and good looking features. I’m not currently locked in because this is not a tutorial on that, but I just wanted to show you that in case you don’t know and feel free to browse around here where you can get some free assets or some items that are on sale if you want to use that to populate your, mixed reality worlds.
So as you can see right here, we’ve got flying Fantasy Town and all kinds of things that are currently for free on the store. And these are like completely beautiful worlds. Like if you’re really experienced from a 3D perspective and you don’t know how to build worlds, you don’t have access to artists, this is definitely a great resource for you to kind of be pulling through.
And it’s also available as a plugin right now inside of Unreal Engine 5.6. It’s been released earlier. You just got to manually enable it. In the older versions now it’s kind of by default in the engine. Okay. So that’s installed now. So we’re just going to going to activate it. So like I said, the first thing you’re going to be asked is this to log into your media account.
It’s going to open up in the browser. I’m opening on an off screen mode here. I’m just going to log in and authenticates. And there you go. You’re going to select your device. And you might not have seen that I had the button kind of a little bit off screen there. So I’m just going to go and click my S3.
Now here’s your options. You’re going to have an option for the air link. Or you can do it with a normal link cable. Now for the most of it, if you’ve got a strong enough kind of internet connection, if you’re running on 5G for them, you should be fine. But one of the big reasons people get VR sickness is because of the drop in frame rates.
And if you’re going to be in a developmental space, you’re going to get a lot of frame rate drops. So it’s probably not going to be the best experience for something that can get laggy. So I would recommend just, you know, picking up a link cable. It really is just a very, you know, decent sized long C type, cable at the end of the day and you want to grab that and then you want to kind of connect that.
So I’m just going to go ahead and do that with mine. And you’ve got the two sides like with the normal kind of connecting points. And then you’ve got the hook space that can connect to the headset itself. So one of the reasons why it’s nice to get this one came, now that you’ve got that, you wanted to connect that up to your headset and you want to turn on your headset, we’re going to just pretend that this entire maze of cables that I just threw underneath my desk actually doesn’t exist, and everything is smooth and beautifully packed together, as it obviously is.
You’re going to hit that in on the side. You also get the nice thing about this little cable you can use often a little binder for the cables. You can just use that also to bind this together so you don’t have, you know, the cable moving in and around all the different spaces. Once you’ve got that and you can just turn on your headset and you can select the cable option that you’ve got.
And then what you got to do is you want to make sure that when you’re in this kind of hit, it hits the space that you actually turn on your unit. So the first time I’ve ever tried it with glasses is actually quite clear. I mean, it’s pretty clear normally, but it’s got like long distance glasses. It’s not like close.
It still looks.
And I’m going to still kind of accept that. And I’m going to say that is my default, save the minute quest link as an active. There we go. I’ve got the open XR now enabled. And that’s really what I got to do in order to be able to do development inside of this, where you can just go to your settings and from settings go to general and just make sure that you have open XR runtime enabled.
Okay. I’m going to go ahead now. And minimize this again you can scroll around. You can enable default or beta features. If there’s are things that you’re going to be looking at, we will be exploring some other features in the future, like how to use, how to install it with side quests, not assured clients and things like that.
But for now, let’s move on to the Unreal Engine portion of this and actually start getting in dev. So I’ve got 5.6 up. I’m going to launch 5.6. I’m going to go in using the VR template. Now don’t worry. I’m also going to show you how to pull this into an existing project. The logic is very, very similar.
So we’re just going to explore that as well
okay. So if you’re you’re loading up your Unreal Engine, the first thing we’re going to do is we’re going to get games. And then from games we’re going to select the VR template. You’re obviously going to find a location that you want to store that out to. So I’m just going to call this VR demo.
And you’re going to hit create and then give it a moment to finish learning. Obviously the first time you’re learning Unreal Engine, it has quite a bit of a delay because it has to compile shaders and everything like that. So great time to go get that coffee. Okay, so our project is finally opened up. You might get a little update if you need to go ahead and update or do what you want to.
So we are in the base project. So the nice thing is because we’ve now obviously got our meta quest running, we’re all good. It’ll actually if we go up to the change play mode option, we are not going to see anything until we actually enable our quest banana. We have to make sure that your headset is enabled. And it is in link mode.
Otherwise you’re not going to get the option to do anything inside of engine with it. Now that I’ve done that, now you can see the VR preview becomes available. So now I can go ahead and I can select VR preview. And there we are. We we’re ready. We’re good. We can look around. We can do all the stuff that you could do inside of this little funky menu.
And I’m just going to increase this for future use case. We’re back in now. This is cool. You’ll see like there’s your character start point. Four things to to note about this. If I look into the game mode setting, there’s this VR game mode. And the VR game mode is very useful because like once it does, it kind of instantiates the VR porn as your kind of main class, and it sets it up for the player start position.
So you’ve got everything you need or set the spectator porn if you want that, you don’t need that. So you don’t have to use the game mode if you’re going to set that up in your own. But if you are, you just want to consider that’s really what it’s doing. So let’s just say we want to start a whole fresh new level.
So create a new level. We’re going to call a case a basic map. So it’s not too complex or too big. We’ve got our basic map here which has a player start on it has a floor. It has a player start. It has you know, basic lights and directional lights and everything like that. So we want to set this up as a VR kind of space so we can go very, very quickly.
Like as I mentioned, I can literally just go to the game mode here and I can go, VR game mode, which is will read right there. And I could from here on literally just hit play and boom, I am and I am inside of the space. I can actually look around in the VR and that’s good. I can’t move or do anything.
So so firstly, we know we can now do that by literally just enabling this on the game mode, assuming we thought the VR project kind of in our piece. Now, what I’m going to do is just take a, take a few steps back in case you don’t want to do that and let’s just, bring that up again and let’s just disable this.
Let’s just put it to none so you can skip building blocks, so to speak. So the building blocks of this thing firstly would be that you would need a VR plugin. Now in the game mode instantiates that for us. But for this sake of this we’re just going to drag one in. We’ve got the VR plugin there and we’re going to grab the camera up a little bit.
That’s good. Now I’m not going to be able to see where I’m going anyway because everything looks the exact same. So I’m just going to go ahead and create some markers here for myself. So I’m going to go in. I’m going to create a shapes. Let me use some cones like as a path tool for myself and all.
I’m kind of really going to do with this. I’m just going to zero this, out in all aspects, at first, and then I’m going to drag it up and I’m going to actually just scale it up, scale up for the sake of visibility. And I’m not going to do anything fancy here. I’m literally only doing this.
So I have, markers essentially around the scene in order to help me calibrate when I’m in VR, that I’m actually, moving between different objects and not just really imagining myself to be moving. Okay, so I’ve got that. I’ve got my kind of character start here, which I could probably delete. Now I don’t really need that. So let’s leave it for the sake of this.
For that now, obviously to work, since I don’t have a starting point, I have to and I’ve got my VR play. I’m going to have to go to my VR plan. I’m going to have to set player to zero, as the, auto possess of that VR spawn. So again, like those are your there’s just some options.
You can use any one that you want to you can use the game mode to start, and to, you know, make the player start point, be the pawn. Or you can just drag the pawn in and you can set that as sort of possess to. It’s up to you now, even though I’ve got this in, I’m not I’m still not going to be able to move.
And the reason I’m not going to be able to move is because for me to move, I have to actually implement a nav mesh balance. So this is the nav mesh. You also use it to look for your eyes. So I’m actually just going to, kind of just look at my options here. And I have the brush draw strokes of it.
And I have the kind of size options here. So I’m going to use those this off screen essentially to you know, increase the size. But what I’m going to do just for visibility sake is I’m going to just resize it here. And let’s just make it all the way out to that side and all the way out to there.
And that should actually be, fairly good. I’m going to pull down like a tiny bit. And, if you were already in game mode, in other words, you’re seeing like these icons, which if you press G, you can toggle and if you have them on and you press P, that will now actually help you render the, the mesh to where it can be.
Now, as we can see like here that actually sorry wrong location. That actually wouldn’t do anything for us. So what I’m going to do is I’m just going to zero that out and get it on the floor. So now we can actually see like where we were actually been working. So let’s do that. Get a little bit of a better visual.
Well my Unreal Engine friends are going like why are you taking so long bro? This is forever work. Excuse me sir. Okay, cool. So that’s the nav mesh. So now based upon that, I can actually hop into VR. And that’s put on the headset and get it out of sleep mode. And here we go. Now I can move around.
Now I’m having some problems. You notice here that, you know, my screen’s a bit jerky and like, it doesn’t move there for the first second, but now it’s not moving at all. So I’m going to take that off. So a little bit of the extra shake here is just I think because my, my tracking is a little bit off of the lighting in the space.
Okay. So this inability to grab things actually has to do with the floor that I am on. So if I’m going to go over to the floor, if you get that, you’ve put the knife mesh over, but you can’t move anywhere. What you want to do is you want to head up to your collisions and you might have this block all dynamic.
So that’s usually the setting for the default scene. So just go to block all. And now that it’s got block all, now all that you have to do is retry. And you should be.
So now I can actually move and get to the locations that I want to okay. Now this is a little bit sketchy of all these blocks. So let’s give something that we can kind of interact with. So that’s shaking is just a little bit of a glitch going on with my headset okay. So now what I want to do is I want to interact with something because like what’s the point of VR if you can do some stuff with it, right.
So let’s go to let’s go to shapes and let’s grab a cube. And again I’m just going to zero this out and by zero this out, what I really mean is I’m setting its location to pretty much zero zero, and all, and now I’m just double clicking on it in the outliner in order to get to it.
And then from here on, I’m just going to, move it up and I’m going to resize and reshape it. Let’s make it like such. And I’m going to duplicate that. I’m going to drag it up so it’s out of view, I’m going to reshape this. A little bit smaller. I’m. Yeah. One more and make it a little bit more of my H.
Cool. Well, a little block like a little taller. Block like. That’s cool. Fine. Now, one of the things that I want to do is because I actually want to be able to interact with this piece. So what I’m going to do is firstly, I am just going to, go over to its materials tab and I’m just going to give it a bit of a more visual material so I can identify clearly inside the world.
And then what I want to do is I want to go to physics and I want to simulate physics and, I’m going to give it a mass of, 0.5kg. And now for me to be able to actually do something with this to behavior manipulated, the unreal VR project comes with a nice grab component. So I can go to add components and go find the grab component and then grab component.
And then I can just add that in here. Now again you want to make sure that you’ve got physics enabled. If you don’t if you’ve modeled maybe an item and you can’t. And the physics option is grayed out for you, then that’s because it doesn’t have a static body or it doesn’t have collisions on it. So you might have to then go into the mesh that’s in your, it’ll show up inside of your, your content browser.
Go into that and there go create collisions for it so that you can actually, apply physics to it. So you, you do need to have a physics ready object in terms of that. Okay. So let’s, let’s hop back in and see what we get. We might have proportioned sizes out here.
Okay. So assuming you can kind of manage my little weird glitch there, I can now pick it up and I can throw it. There you go. Right. So you can teleport through your space nicely. You can turn you can pick up objects and you can apply that to any kind of object inside of your scene, which I think is really like powerful.
It gives you a lot of kind of just get up and running very quickly. Projects. So that’s that’s super cool. I think if you, if you’re not really building a complicated piece, like you just need something where somebody puts blocks into different places or, you know, you just want to explore an architectural environment or anything like that, you can do it.
So I’m going to show you another one. Now we can just load up another project because this is not obviously starting all for the VR template. But what happens if you’ve got an existing project and you want to bring all of that in? So let’s do that in the next clip.
Essentially, here’s the things that you want to keep in mind.
So number one, most of the stuff that you’re going to need is available inside of the VR template that already is available inside of Unreal Engine. Now there’s two there’s three really useful things from that that you can then use to inherit into other components. And they’re quite simple. So number one is your, VR porn, which is pretty much the character, so to speak.
It’s already rigged for the process. And that also contains the teleportation behavior. And things like that already into it, as well as the kind of blocked movement. Now, obviously you want more mechanisms. You can have to kind of code those in and we can explore those in the future if you’re interested. But essentially what you’re going to do is you need the VR porn.
You also then have on any asset that it interacts with in the world. There’s a component that’s been created by unreal called the grab component, and you can attach that grab component to any other, static mesh. And I mean a mesh that has a static component on it and has collisions on it that can have physics simulated onto it.
So you need to be able to have physics simulated on it so you can throw it or movement or change it or something like that, in order for you to apply the grab component to it and for it to work. And the next thing you need to understand is navigating through that space requires the nav mesh. So the nav mesh needs to be added to your flight, and then you can use that in any other part of the experience.
So you could literally go ahead and you can create new levels, and you can just drag that point in. You can set up in nav mesh in the areas that the player can move to you, and you can apply the grab mesh to any items that you wanted to interact with. And you’re basically good to go and get started.
So you may have an existing project and you’re like, I don’t want to start all that, friend. Don’t worry fam, I’ve got you. All you have to do is open up your existing project, go into it and then click onto the Add Projects from Add Projects. Go ahead and import in essence. Now you can actually import the pack for the VR into your experience.
Okay, so we’re in a existing project this is one that was for a short bit on a special inside of the Unreal Engine store. Or sorry, the Fab Marketplace. So we want to bring VR as part of this thing. So what we really have to do is go to the content browser and then go add and then import.
Oh sorry, the add feature or content pack. And then from here and now you can select the virtual reality project. So you can just go ahead and you can add that. And then obviously you go to enable the missing plugins and import the required assets. And then that’s all. So you’re going to just import there and there.
And then once all of that is done you want to just restart your, your engine. So let’s do that now. And might ask you to save anything that you’ve modified. Okay. And now it’s kind of brought that in for us so we can go back to any of our maps that we may have. So I’m going to open up that third person map and give it a moment to load.
There we go. And now very similar kind of experience. What I’m just going to do is I am going to very much just as I did in the previous one. I’m going to go and load in that, search for the VR game mode. I’m going to enable myself with that. And then I am going to load in a nav mesh.
And I’m just going to, Just really build that out a little bit.
That’s good. And then I just want to see the spaces. We can still list of spaces to walk in. So that’s all good. And, let’s make sure my VR headset is enabled. It’s all good. So now I should be able to switch over into VR preview mode. And there I go.
I am in VR. In the scene that I’ve just had. So there you go. That’s how to add the vaccine, or the VR functionality from the base project into your existing name project,
if you like this, and if you’re interested in seeing more episodes around like these, a little bit of deep dives, little quick starts or something like that, please let me know.
Especially on topics or ideas in the engine or in any other piece of tech in software.
While in anything else in the digital space that you’re interested in that you want me to go into, if you’re completely new to the channel, I’m, I’m technomancer I code in everything. I love tech, I live tech, I’ve been doing it for, you know, from afar over two decades. And if you’re looking for a tech partner or a business person to work with in the tech space, someone help you create that app, realize those dreams, build their products.
You got hit me up information down below. I hope you enjoyed this video and I’ll see you next episode.
